source:Industry News release time:2023.09.19 Hits:1 Popular:led screen wholesaler
1. Chip inspection
Microscopic inspection: Whether there is mechanical damage and pitting on the surface of the material. Whether the chip size and electrode size meet the process requirements. Whether the electrode pattern is complete.
2. Expansion
Since the LED chips are still arranged closely and with very small spacing (about 0.1mm) after dicing, it is not conducive to post-process operations. We use an expansion machine to expand the film that adheres the chips, so that the distance between the LED chips is stretched to about 0.6mm. Manual expansion can also be used, but it can easily cause undesirable problems such as chip dropping and waste.
3. Dispensing glue
Apply silver glue or insulating glue to the corresponding position of the LED bracket. (For GaAs and SiC conductive substrates, red, yellow, and yellow-green chips with back electrodes use silver glue. For blue and green LED chips with sapphire insulating substrates, insulating glue is used to fix the chips.)
The difficulty of the process lies in the control of the dispensing amount. There are detailed process requirements for the colloid height and dispensing position. Since silver glue and insulating glue have strict requirements for storage and use, the awakening, stirring, and use time of silver glue are all matters that must be paid attention to in the process.
4. Prepare glue
Contrary to glue dispensing, glue preparation is to use a glue preparation machine to first apply silver glue on the back electrode of the LED, and then install the LED with silver glue on the back on the LED bracket. The efficiency of glue preparation is much higher than that of dispensing, but not all products are suitable for the glue preparation process.
5.Hand-made slices
Place the expanded LED chip (with or without glue) on the fixture of the thorning table. Place the LED bracket under the fixture. Use a needle to pierce the LED chips one by one into the corresponding positions under the microscope. Manual punching has an advantage compared to automatic mounting. It is convenient to replace different chips at any time, and is suitable for products that require the installation of multiple chips.
6. Automatic racking
Automatic mounting actually combines the two steps of glue dipping (glue dispensing) and chip installation. First, dot silver glue (insulating glue) on the LED bracket, then use a vacuum nozzle to pick up the LED chip and move it to the position, and then place it on the LED bracket. corresponding bracket position.
In terms of process, automatic racking mainly requires familiarity with equipment operation and programming, and at the same time, adjusting the glue and installation accuracy of the equipment. In the selection of nozzles, try to use bakelite nozzles to prevent damage to the surface of the LED chip. In particular, blue and green chips must use bakelite. Because the steel nozzle will scratch the current diffusion layer on the chip surface.
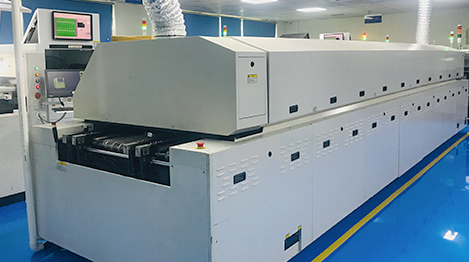
7. Sintering
The purpose of sintering is to solidify the silver glue, and sintering requires temperature monitoring to prevent batch defects. The sintering temperature of silver glue is generally controlled at 150°C, and the sintering time is 2 hours. It can be adjusted to 170℃ for 1 hour according to the actual situation. Insulating glue is generally applied at 150°C for 1 hour.
The silver glue sintering oven must be opened every 2 hours (or 1 hour) to replace the sintered products according to the process requirements, and it must not be opened at will in the middle. The sintering oven must not be used for other purposes to prevent contamination.
8. Pressure welding
The purpose of pressure welding is to lead the electrodes to the LED chip to complete the connection of the internal and external leads of the product.
There are two types of LED pressure welding processes: gold wire ball welding and aluminum wire pressure welding. The picture on the right shows the process of aluminum wire pressure welding. First press the first point on the LED chip electrode, then pull the aluminum wire over the corresponding bracket, press the second point and then tear off the aluminum wire. The gold wire ball soldering process involves burning a ball before pressing the first point, and the rest of the process is similar.
Pressure welding is a key link in LED packaging technology. The main things that need to be monitored in the process are the shape of the press-welding gold wire (aluminum wire), the shape of the solder joints, and the tension. In-depth research on the pressure welding process involves many aspects of issues, such as gold (aluminum) wire materials, ultrasonic power, pressure welding pressure, selection of riving knife (steel nozzle), motion trajectory of riving knife (steel nozzle), etc.
9. Dispensing and packaging
There are three main types of LED packaging: glue, potting, and molding. Basically, the difficulties in process control are bubbles, excess material and black spots. The design mainly focuses on the selection of materials, and the selection of well-integrated epoxy and brackets. Manual dispensing encapsulation requires a high level of operation (especially for white LEDs). The main difficulty is controlling the amount of dispensing, because epoxy will thicken during use. The dispensing of white LEDs also has the problem of phosphor precipitation causing color difference in light output.
10. Glue potting and packaging
Lamp-LED is packaged in the form of potting. The potting process is to first inject liquid epoxy into the LED molding cavity, then insert the pressure-welded LED bracket, put it in the oven to allow the epoxy to solidify, and then remove the LED from the mold cavity to form.


 CN
CN
 Home >
  RETURN